In recent years, there’s been a clear rise in homeowners embracing DIY projects themselves, rather than paying a professional to do the job for them. This is largely due to social media platforms like TikTok and Instagram popularising the documentation of home improvement and making it seem more approachable and inspiring to the everyday person. Completion of a DIY projection also offers a real sense of accomplishment; that “I did that” feeling that sparks pride in your own ability.
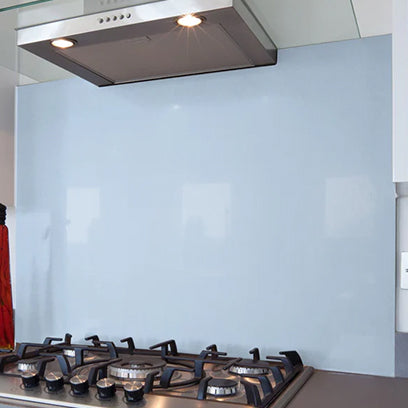
Since glass splashbacks have become a trending kitchen component, more buyers are looking to install these themselves. Due to the material in question, it may seem like a daunting task to approach, but this simple guide will break down the steps and show you exactly how to fit a glass splashback yourself, or simply help you to understand the process.
What Tools and Materials Do You Need?
As with any DIY project, proper preparation is key. Before you start, you need to ensure you’ve got everything you need. This includes:
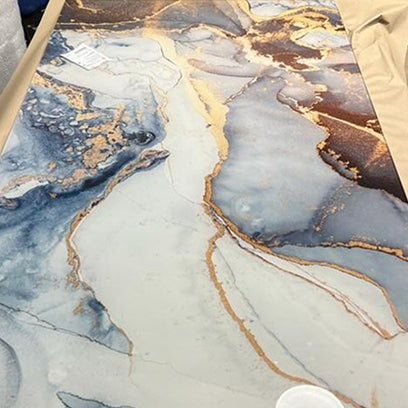
- Glass Splashback: Pre-cut to size, in your chosen design
- Measuring Tape: To ensure for accurate measuring of the installation space
- Spirit Level: To make sure the splashback is perfectly straight
- Silicone Adhesive: To secure the splashback to the wall (opt for non-solvent)
- Decorative Silicone Sealant: For sealing edges neatly and preventing water from seeping in. Use clear or colour-matched silicone
- Cleaning Products: To ensure surfaces are fully clean and dry before installation
Can You Fit a Glass Splashback Yourself, Or Should You Hire Someone?
Of course, the easier option is always to hire a professional to do the job. But that doesn’t mean to say that’s the only option.
If your splashback is pre-cut to fit the space neatly, there are no sockets inside the area, and you’re able to physically lift the glass, then there’s no reason why this shouldn’t be a task you take on yourself.
In comparison to many other home DIY projects, fitting a kitchen splashback is relatively straightforward, as long as you follow the steps.
Step By Step Fitting Guide
So, let’s get down to the nitty-gritty and break down exactly how to install a glass splashback.
- Using a tape measure, measure and mark the area you want to fit the glass. It’s advised to take the height and width measurements twice to avoid error.
- Clean the wall and the back of the glass thoroughly to remove dust and finger marks. Any specs of dirt will prevent the glass from adhering properly.
- Apply the adhesive in consistently sized blobs all the way around the perimeter of the glass. Be careful not to place your blobs too close to the edge of the glass as the adhesive will then seep out when the panel is pressed against the wall.
- For this step, a second pair of hands is advised. Lift the glass and position into place, using a spirit level to check that it’s straight. When you’re happy with the positioning, firmly press the panel onto the wall so that the adhesive can start marrying the two together. At this point, you may wish to use masking tape for extra security whilst the adhesive sets.
- Seal the edges with a thin bead of silicone sealant to block any gaps and keep out moisture.
- Peel the protective film off the glass panel and wipe away any fingerprint smudges and excess sealant with glass cleaner and a soft cloth. Wait 24-48 hours for the adhesive to fully cure before using the area.
What To Avoid During Installation
There are a few things to watch out for:
- Avoid fast curing silicones (the vinegar-smelling type), as they can damage the paint backing on glass.
-
Don’t install over uneven, loose, or flaky surfaces; the wall must be smooth and sound.
If you’re installing a splashback behind a hob, ensure it meets fire safety clearance guidelines.
Which Surfaces Can You Fit a Splashback To?
Most common wall surfaces in the home are suitable for glass splashback installation. The general guidance is that the wall should be flat/smooth, clean, dry and stable. The glass must be able to bond well, and the surface needs to be strong enough to support the weight of the glass.
Plastered walls, tiled walls, MDF or plywood backing are all suitable surfaces. You can even install a glass splashback over an already existing one.
Surfaces to avoid would be wallpapered walls, raw brick and concrete or generally uneven and bumpy walls. The adhesive won’t bond well to any of these.
How Long Does The Whole Process Take?
If your wall is in good condition, then the whole process should only take around 2 hours. This is as long as you’ve done all your prep work beforehand and have a second person to help position the glass.
The adhesive drying time, after install, takes between 24-48 hours. Once this time has passed, there’s nothing left to do but admire your handy work!
How To Stay Safe When Handling Glass
Even though our coloured splashbacks and printed splashbacks are made from toughened glass, they can still shatter under the wrong pressure, or cut you if chipped, so it's vital that proper safety precautions are taken.
Before bringing the glass panel into the kitchen, it’s important to clear the area first; remove any tripping hazards like tools or cleaning products. Then, lay a piece of cardboard or a blanket down to place the glass safely onto.
You should always inspect for any cracks or chips before handling and if you spot any, do not go ahead with the installation.
When lifting the glass, be sure to handle it in an upright position, not flat; it’s more stable in this position and is less likely to crack if dropped.
Final Thoughts
Fitting your kitchen splashback needn’t be a huge, daunting task; we hope this printed splashback fitting guide has inspired you to go for it. With the right preparation, installation should be a straightforward and satisfying DIY project. You can transform your kitchen with a sleek, modern finish and the pride of saying, “I did that myself.”
Ready to get started? Take a look at our full printed and painted glass splashback range to choose your design. The team at Bespoke is always happy to help with custom sizing and installation advice, should you need it.